How to Install Lag Shield Anchors
Installation Instructions
Installing Lag Shield Anchors can be completed in four easy steps. These anchors can be used when working in concrete, brick and block base material and are best suited for light to medium duty fastening purposes. Lag Shield Anchors are available in 1/4" (long length only), 5/16”, 3/8”, 1/2", 5/8” and 3/4" diameters, are available in both short (for use in harder base materials) and long lengths (for use in softer base materials) and is made from a highly corrosive zinc-based alloy called Zamac. After installation, the fixture is removable because the Lag Shield Anchor remains in the concrete and only the lag screw is unscrewed and removed.
Installation steps:
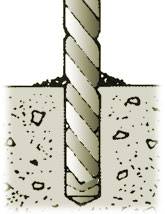
- Drill a hole in the base material with a hammer drill and a correctly sized carbide drill bit for the diameter Lag Shield Anchor you are using. See our technical specifications page for the drill bit size required.
- Clean out the hole of all debris.
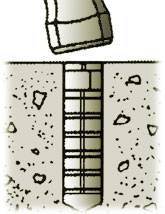
- Insert the anchor into the hole and tap the fastener with a hammer to ensure it is flush with the base material.
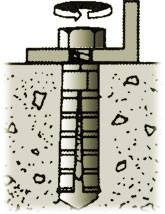
- Set the fixture over the anchor and insert the properly sized lag screw through the fixture and into the anchor.