CONFAST®
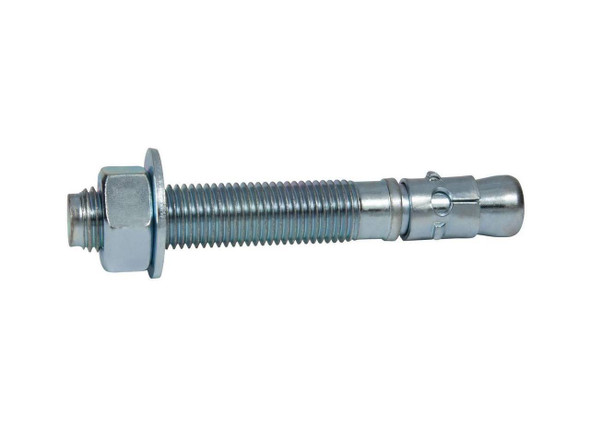
1" x 9" Stainless Steel Wedge Anchor, 5/Box
- SKU:
- WAS19
- UPC:
- 820274003541
- Availability:
- In Stock, Ships Today!
Description
Products Features
- MADE FROM 304 STAINLESS STEEL: Can be used in wet, submerged environments and will not rust; lowered maintenance costs
- COMPLETE LINE: All sizes means the right fastener for every job; wide range of purchase choices
- PACKAGED WITH CORRECT NUMBER AND SIZE OF NUTS & WASHERS: Comes complete and ready to install; saves time and money
- SPECIAL CLIP DESIGN: Prevents anchor from spinning during installation, assures a successful installation process
- CHAMFERED THREADED END: Helps prevent thread damage during installation
Products specifications
| Bit Size | 1" |
| Box Qty | 5 |
| Minimum Embedment | 4-1/2" |
| Wrench Size For Nut | 1-1/2" |
| Primary | Concrete only |
| Thread Type | 1" - 8 |
| Minimum Edge Distance | 5" |
| Maximum Fixture Thickness | 3-1/2" |
| Minimum Fixture Hole Diameter (In Place) | 1-1/4" |
| Minimum Fixture Hole Diameter (Hole Spotted) | 1" |
| Length ID Code | P |
| Brand Name | CONFAST® |
| Minimum Spacing | 10" |
| Maximum Torque | 250 - 300 ft./lbs. |
| Thread Length | 4" |
| 2000 PSI Concrete - Pull-Out (lbs.) * | 7329 |
| 2000 PSI Concrete - Shear (lbs.) * | 17712 |
| Length Measurement | End to End |
| Diameter | 1" |
| Length | 9" |
| Material | 304 Stainless Steel |
| Environment | Wet |
| Type | Male |
* Values shown are average ultimate values and are offered only as a guide and are not guaranteed. A safety factor of 4:1 or 25% is generally accepted as a safe working load
Application Video
Installation Video
Installing a 1" x 9" (nine inches) Stainless Steel Wedge Anchor - Drill a 1" hole into the concrete using a carbide-tipped bit that meets ANSI Standards B212.15.
- Drill the hole a 1/2" deeper than the anchor will penetrate the concrete, making sure the minimum embedment requirements of 4-1/2" is met.
- The hole can be drilled while the fixture is in place. The minimum hole in the fixture for the 1" x 9" (nine inches) Stainless Steel Wedge Anchor is 1-1/4".
- Clean the hole with a wire brush, vacuum, compressed air, or a blow-out bulb.
- Put the nut and washer on the 1" x 9" (nine inches) Stainless Steel Wedge Anchor, making sure the nut is on the last threads; this will protect the threads from damage when the wedge anchor is hammered into the hole and into the concrete.
- Insert the anchor through the hole in the fixture and into the hole in the base material.
- This should be a very tight fit. Then use a hammer to complete the installation until the nut and washer are tight against the fixture. It is important that the threads go below the surface of either the base material or the fixture.
- Turn the nut clockwise on the anchor until finger tight.
- Using a 1-1/2" wrench, turn the nut 3 to 4 times until snug or until the proper torque value of 250 - 300 ft./lbs. is reached.
- Always use proper personal protective equipment per manufacturer's and OSHA instructions.
Additional Information
Bit Size: |
1" |
Minimum Embedment: |
4-1/2" |
Thread Length: |
4" |
Primary: |
Concrete only |
Environment: |
Wet |
Thread Type: |
1" - 8 |
2000 PSI Concrete - Pull-Out (lbs.) *: |
7329 |
2000 PSI Concrete - Shear (lbs.) *: |
17712 |
Type: |
Male |
Diameter: |
1" |
Length: |
9" |
Material: |
304 Stainless Steel |
Box Qty: |
5 |
Minimum Spacing: |
10" |
Minimum Edge Distance: |
5" |
Maximum Fixture Thickness: |
3-1/2" |
Minimum Fixture Hole Diameter (In Place): |
1-1/4" |
Minimum Fixture Hole Diameter (Hole Spotted): |
1" |
Length ID Code: |
P |
Maximum Torque: |
250 - 300 ft./lbs. |
Wrench Size For Nut: |
1-1/2" |
Length Measurement: |
End to End |
Brand Name: |
CONFAST |


